Unpack gently
Support the base or frame as you lift it out. Ease apart any strands that shifted during delivery without pulling the beads.
BeadLeaves
Beginner-friendly to make · Beautiful to display
Materials for you to assemble. Check the included items and project guidance below.
Compare DIY and finishedCouldn't load pickup availability
A little more sparkle for your next project.
Add one of each selected option. Buy any 2 eligible items and save 5% automatically—even two of the same item. Eligible email subscribers can also use WELCOME for an extra 10% off. Final savings are shown at checkout.
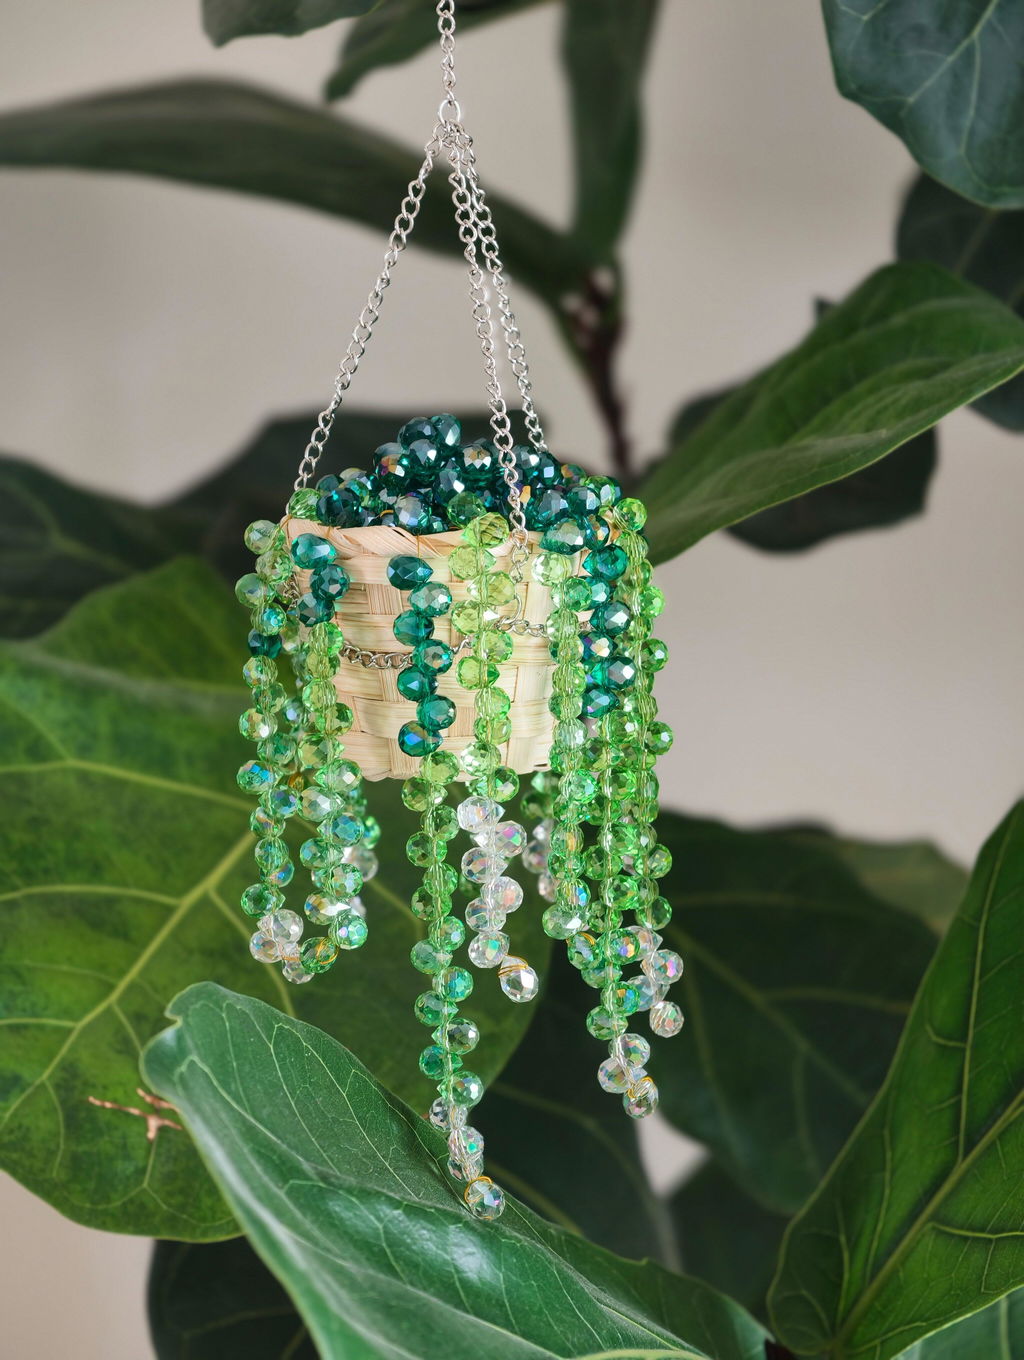
View cartCreate one sparkling green beaded hanging plant for a window, shelf, or cozy corner.
Choose DIY Kit for the materials and making experience, or Finished Piece for the assembled design.
Arrange the three green shades in your own pattern to make the design personal.
For the DIY Kit format:
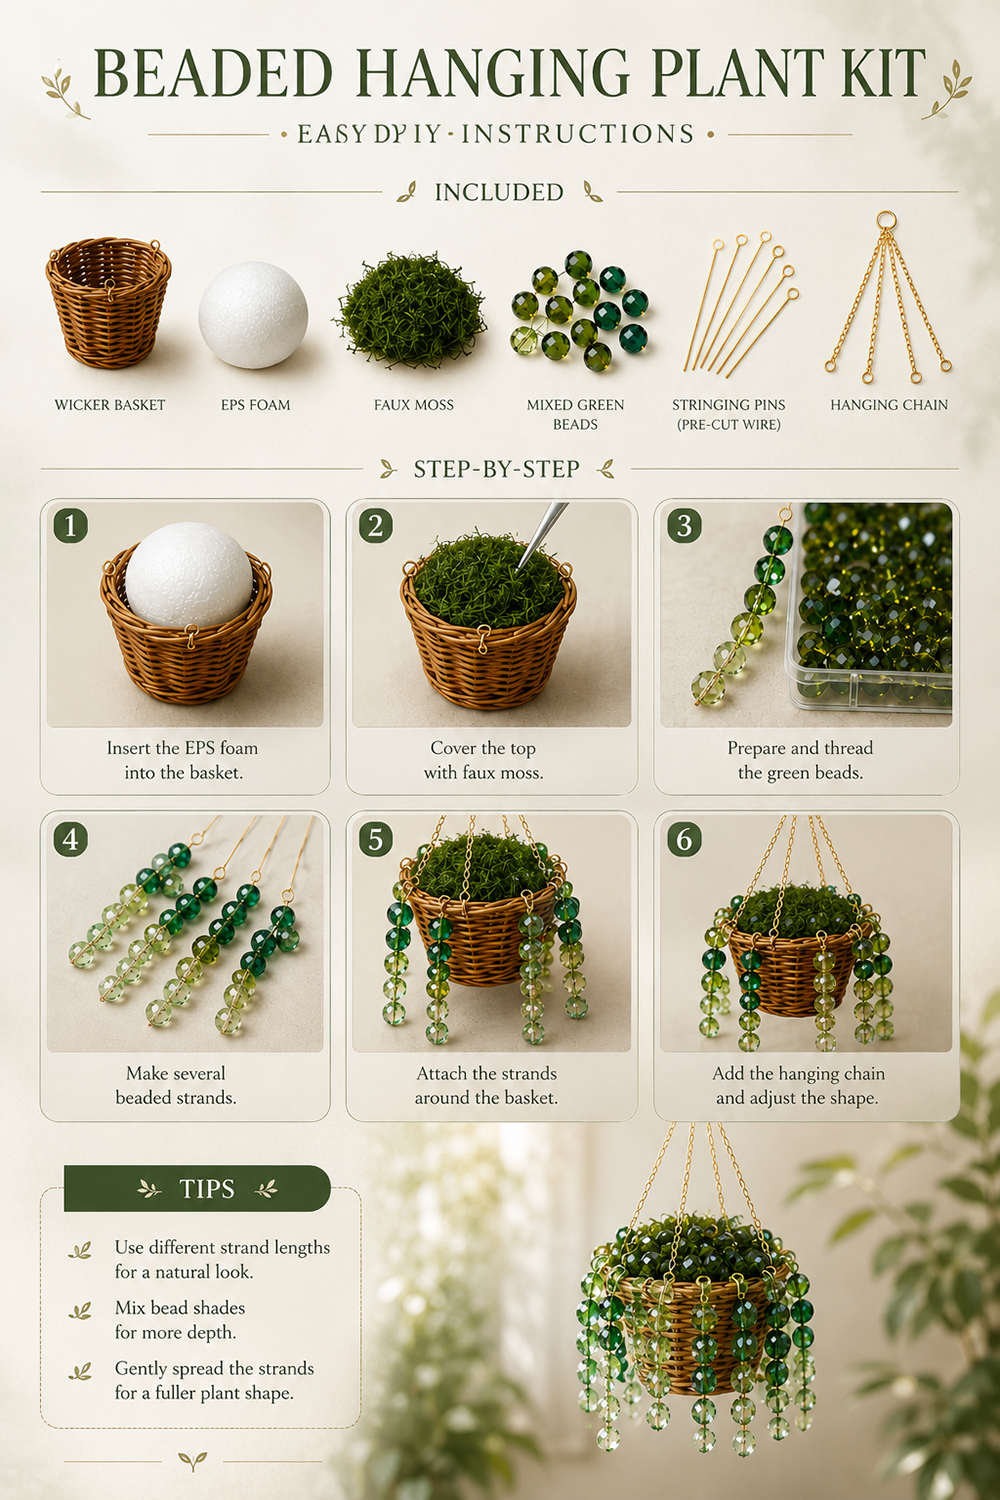
• 270 green glass beads in three complementary shades
• 14 metal pins
• Woven basket
• White foam insert and decorative moss
• 0.3 mm craft wire
• Silver hanging chain
• Assembly instructions and access to the video tutorial
• Makes: 1 classic green beaded hanging plant
• Difficulty: Beginner-friendly
• Making time varies by design and experience
• Recommended age: 12+
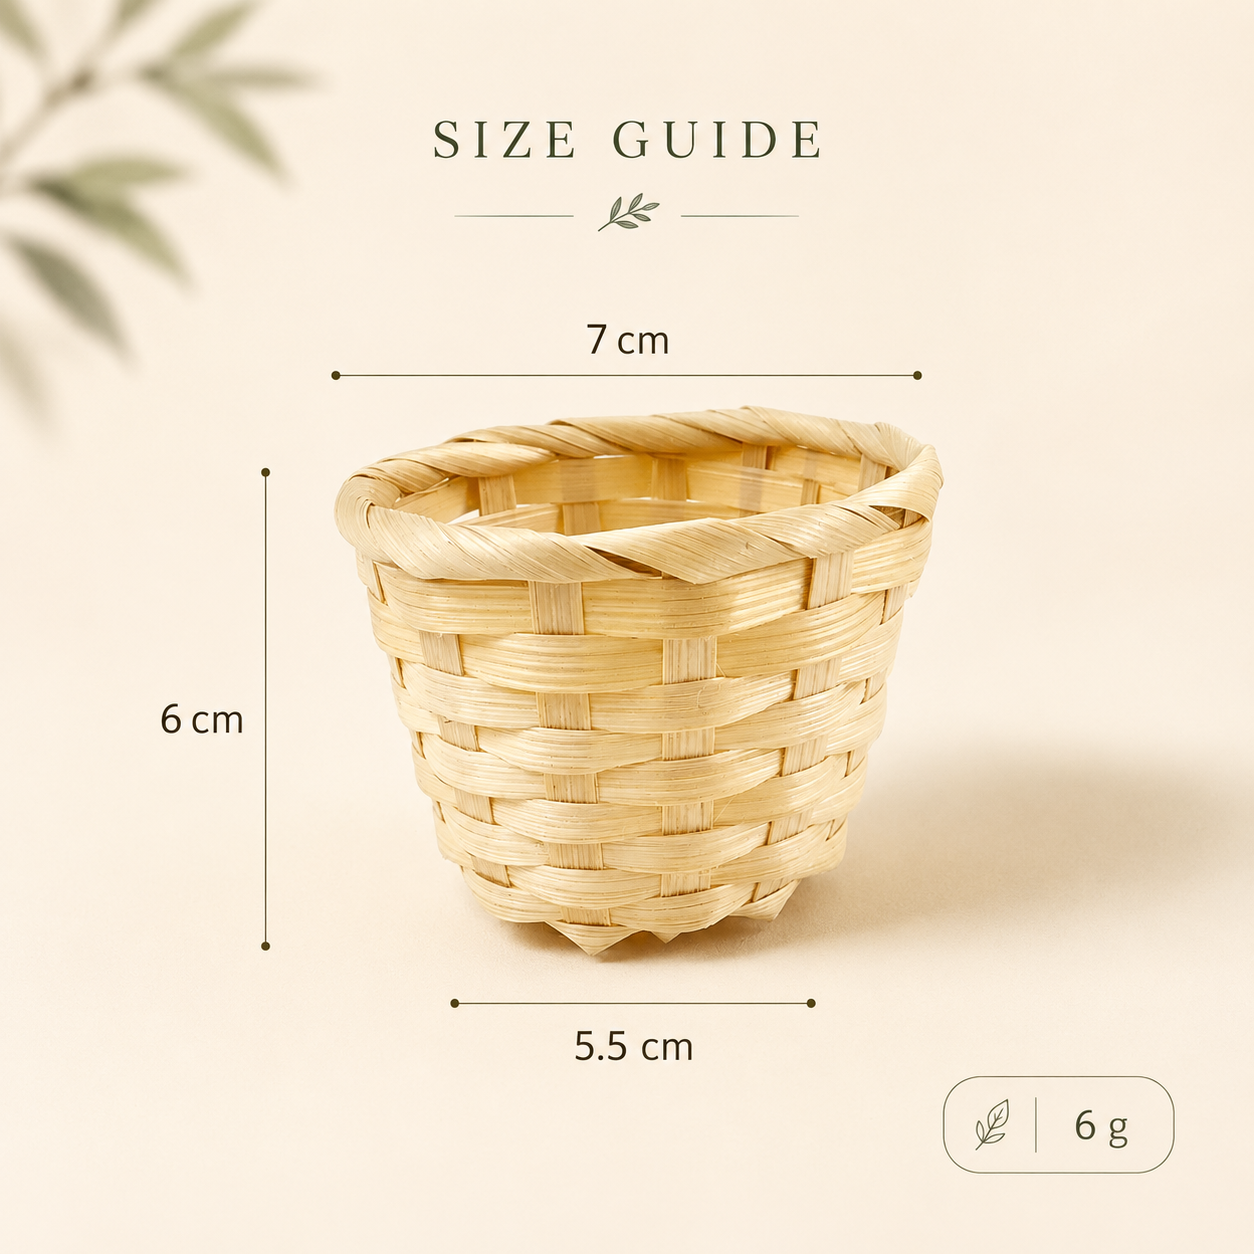
• Basket: 7 cm top width × 6 cm height × 5.5 cm base width
You will also need a pair of scissors. Scissors are not included.
1. Arrange the beads and plan your strands.
2. Build the beaded leaves and strands with the included pins and wire.
3. Secure the strands inside the woven basket.
4. Add the finishing materials, attach the chain, and hang your completed piece.
Recommended for ages 12 and up. This kit contains small beads, wire, pins, and other small components and is not suitable for young children. Adult guidance is recommended when needed.
Colors may vary slightly because of lighting and screen settings.

The selected design arrives assembled. No beading, scissors or crafting steps are needed.
Support the base or frame as you lift it out. Ease apart any strands that shifted during delivery without pulling the beads.
Use the attachment supplied for your design, or place a standing design on a stable surface. Check the product dimensions before choosing its display spot.
Dust gently with a soft, dry cloth. Avoid soaking, pulling the beadwork or bending the wire repeatedly.
GREEN BEADED PLANT DIY
Follow five clear stages: prepare the woven basket, add the faux moss, make the green beaded strands, arrange them for a natural cascading shape, and attach the hanging chain.
Each DIY Kit makes one finished piece and includes project guidance. Making time varies by design and experience.
Scissors are required and are not included.
Follow a step-by-step video tutorial and make the project at your own pace.
Apple, olive, and teal faceted glass beads create a layered, natural look.
Pick Mini, Classic, or Extra Full to match your display space and preferred density.
GREEN DIY KIT FAQ
Choose your preferred format on this page. A DIY Kit contains materials for you to assemble; a Finished Piece arrives assembled and ready to display.
Mini Green includes approximately 120 beads and 14 pins. Classic Green includes approximately 270 beads and 14 pins. Extra Full Green includes approximately 540 beads and 28 pins for a denser, fuller result.
Yes. The kit uses faceted crystal glass beads in apple green, olive green, and teal green.
The DIY Kit includes beginner guidance. Compare the steps and tools before choosing; making time varies by design and experience.
Please prepare scissors; they are not included. Optional craft glue may be useful when securing the Mini car-display version.
The step-by-step video tutorial is available at beadleaves.com/pages/diy-tutorial.
Yes. You can vary the strand lengths and placement to create a more organic or symmetrical shape.
It contains small parts and craft wire. It is intended for ages 12 and up, with adult guidance where appropriate.
Yes, if it is securely attached and does not block the driver’s view or vehicle controls. Classic and Extra Full versions are better suited to home or window display.
I really enjoyed making this little hanging plant. The steps were easy to follow, and I liked arranging the different green beads and strand lengths myself. It took some patience, but in a relaxing way, and seeing it slowly come together was the best part. Once I hung it near my plants, the beads caught the light beautifully and made the whole piece feel fresh and handmade.
I honestly didn’t expect to enjoy making this as much as I did. Stringing the beads took a little patience, but it was actually really relaxing. Once I hung it by the window and saw the sunlight catching all the green beads, I was so happy with how it turned out. It feels even more special what I made it myself.
Such a relaxing little project. I’m pretty new to beading, but this was much easier to follow than I expected. I liked choosing where to place the different shades of green, and the finished plant looks so pretty when the afternoon light hits it. It’s small enough to hang by my desk without taking over the space.
Join the BeadLeaves Craft Club for new designs, tutorials, and creative inspiration — plus 10% off your first order.
🌿 Beginner-friendly DIY beaded plant kits
No spam. Unsubscribe anytime.